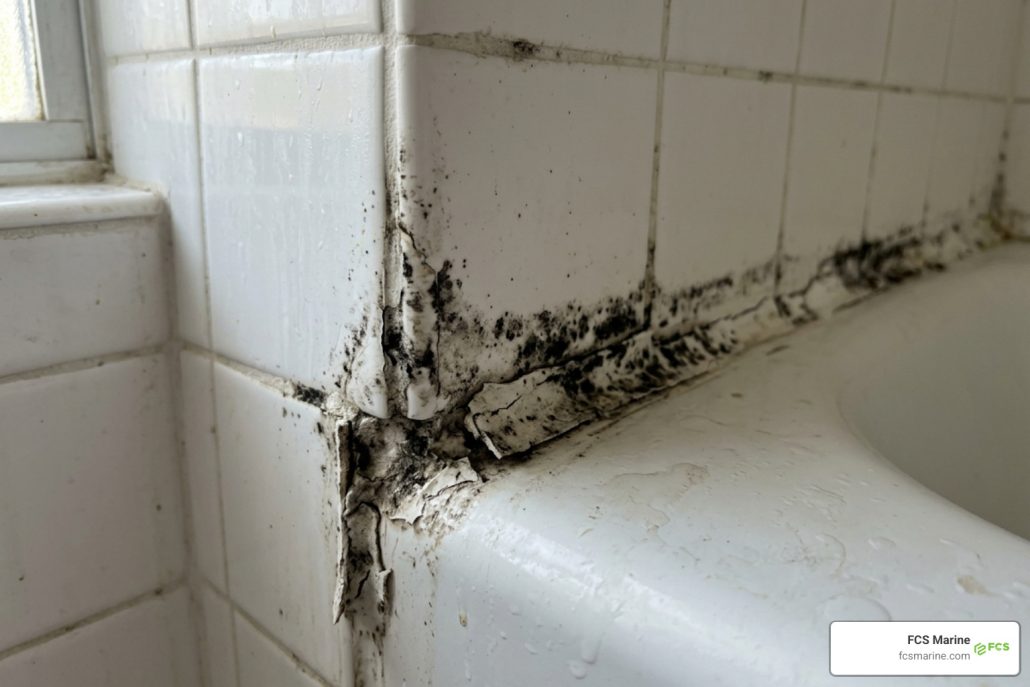
Mold Removal Shower Caulk: Clean It or Replace It?
For a mold removal shower caulk project, start by checking the seal. If the caulk is smooth, firmly attached, and the staining lightens with cleaning, treat it as surface growth: ventilate the area, apply a caulk-safe cleaner such as white vinegar or 3% hydrogen peroxide, allow contact time, scrub gently, rinse, and dry fully.
If black staining remains, returns quickly, or the bead is cracked, peeling, soft, or loose, cleaning is only a short-term fix. Remove the old caulk, disinfect and dry the joint, then apply new 100% kitchen-and-bath silicone caulk labeled mildew resistant.
On a South Florida yacht, shower humidity and limited airflow can keep moisture against caulk long after use. That trapped moisture can allow mold to grow inside or behind a failed seal, where surface cleaners cannot reach it.
FCS Marine helps yacht owners address onboard moisture and maintenance issues before they affect comfort and daily operation.
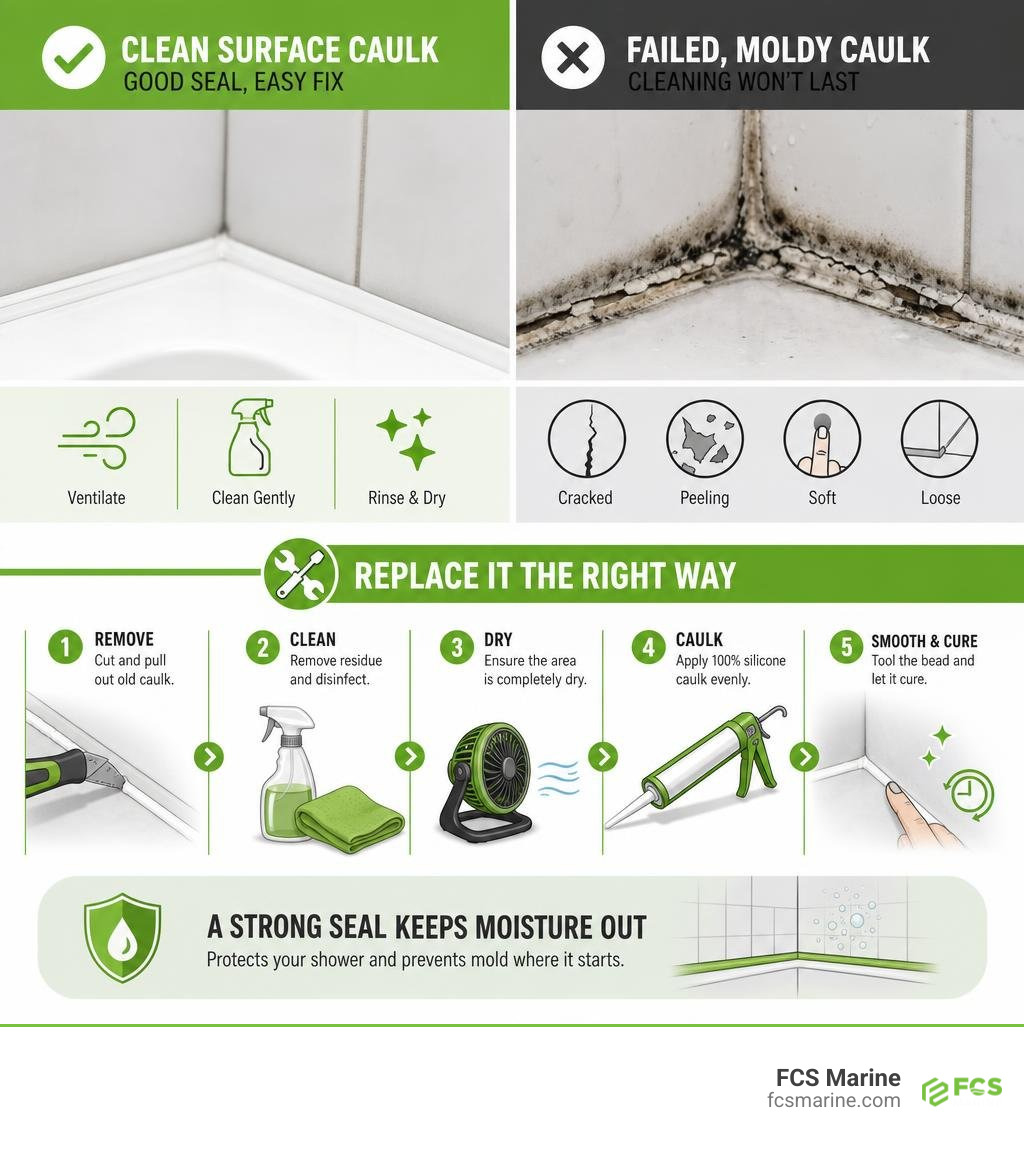
Why Cleaning Fails: Surface Dirt vs. Compromised Seals
Anyone who has spent time maintaining a marine vessel knows that high ambient humidity coupled with enclosed head compartments creates an incubator for fungal growth. Often, vessel owners spray household cleaners or harsh bleaches on dark shower seams, only to see the black spots return within days.
Understanding why this happens comes down to understanding fungal biology and sealant degradation. Caulk is not an impervious metal barrier; over time, standard marine use, structural vibration, and exposure to cleaning chemicals cause microscopic fissures in the bead. Mold develops root-like structures called hyphae. When moisture becomes trapped behind a weakening seal, these hyphae penetrate the microscopic pores of the silicone.
Surface cleaners only contact the exposed exterior face of the sealant. While bleach may temporarily strip color from visible growth via oxidation, it fails to reach the fungal network anchored inside and behind the caulk line. For vessel owners, learning the fundamental differences when evaluating mildew vs mold is essential to choosing the right remediation strategy rather than wasting hours scrubbing superficial stains.
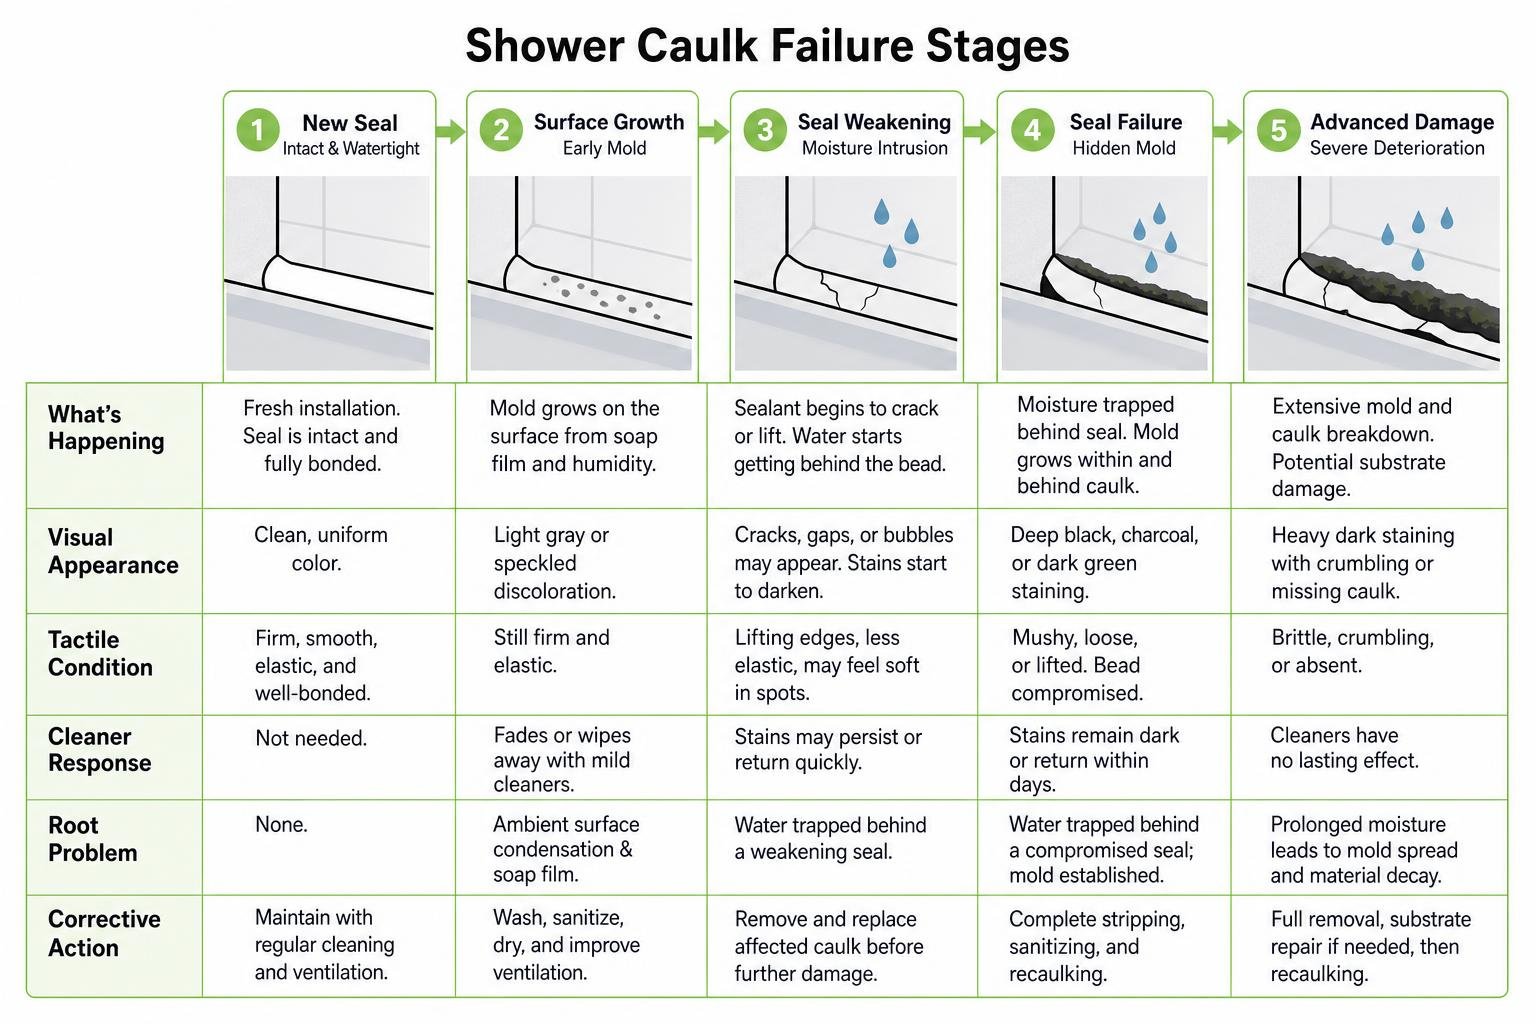
| Feature | Surface Fungal Growth | Embedded Caulk Seal Failure |
|---|---|---|
| Visual Appearance | Light gray or speckled discoloration | Deep black, charcoal, or dark green staining |
| Tactile Condition | Caulk bead remains firm, elastic, and bonded | Caulk feels mushy, lifted, cracked, or loose |
| Cleaner Response | Fades or wipes away with mild cleaners | Stains remain dark or return within days |
| Root Problem | Ambient surface condensation & soap film | Water trapped behind a compromised seal |
| Corrective Action | Wash, sanitize, dry, and improve ventilation | Complete stripping, sanitizing, and recaulking |
Warning Signs of Hidden Mold Behind Shower Caulking
Catching compromised seals early prevents moisture from penetrating behind shower bulkheads, where structural fiberglass or composite backing can harbor extensive fungal colonies.
Keep an eye out for these telltale signs:
- Peeling or lifting edges: Any gap along the caulk edge allows shower spray to migrate behind the shower pan or tile joints.
- Bubbling sealant: Trapped air and water behind the caulk create small blisters along the bead.
- Persistent musty odors: If an enclosed head smells damp even after thorough cleaning, moisture is likely pooled in hidden joints.
- Elasticity loss: Brittle, hardened caulk fractures under normal vessel motion while underway.
- Sub-surface discoloration: Dark staining visible through translucent silicone indicates active colonies beneath the bead.
For mild surface issues on intact seals, utilizing non-bleach bathroom caulk cleaning strategies helps lift light grime without degrading the caulk’s chemical composition. When deep structural dampness is present, physical removal becomes unavoidable.
The 3-Step Process for Mold Removal Shower Caulk Restoration
When a seal fails, careful joint rehabilitation is the most dependable solution. Attempting to apply fresh silicone over old, moldy material simply traps moisture and fungal spores, accelerating substrate damage.
Before starting, ensure personal safety and adequate ventilation. Enclosed yacht heads concentrate airborne spores during mechanical scraping. Wear an N95 respirator, protective eye goggles, and waterproof nitrile gloves. If available, operate an air purifier alongside the head’s exhaust blower to capture dislodged spores. Implementing proven techniques for mould removal from silicone ensures you complete the restoration correctly the first time.
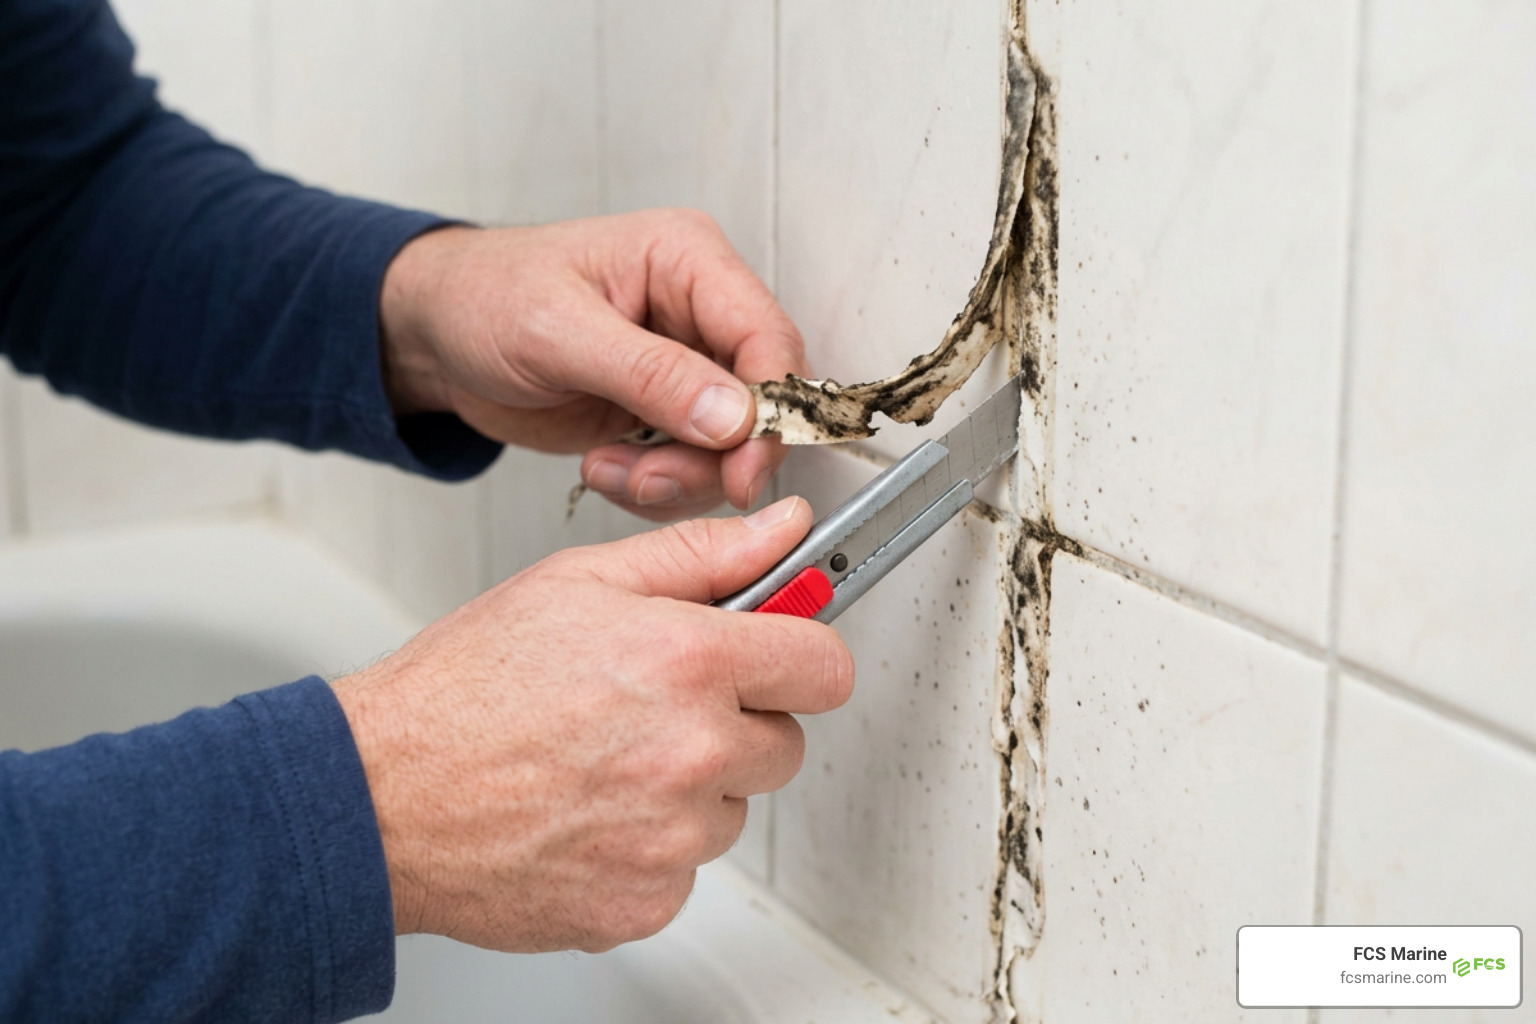
Step 1: Complete Mold Removal Shower Caulk Stripping and Joint Prep
The first step is total mechanical extraction of the old, contaminated sealant.
- Score the Caulk Margins: Using a sharp utility knife or specialized caulk removal tool, carefully score along both the top and bottom edges of the bead. Keep the blade angle shallow to avoid scratching surrounding gelcoat, acrylic, or tile surfaces.
- Extract the Bead: Pull the severed silicone away from the joint. It often comes out in long strips. Use needle-nose pliers to grasp stubborn pieces wedged deeply into interior corners.
- Scrape Remaining Residue: Scrape away every trace of old silicone residue. New silicone will not adhere to old silicone. If tackling this as a DIY project, consider budget-friendly silicone removal methods like using plastic scraping blades paired with a standard hairdryer on low heat to soften stubborn patches without damaging finishes.
- Mechanical Degreasing: Wipe the open seam clean using lint-free cloths soaked in isopropyl rubbing alcohol to lift away body oils, soap scum, and loose debris.
Step 2: Deep Substrate Disinfection and Spore Reduction
With the seam completely opened, the underlying substrate must be sanitized to reduce embedded spores before applying new caulk.
- Apply Fungicidal Solution: Saturate the open seam with undiluted 3% hydrogen peroxide or white distilled vinegar. Avoid mixing these chemicals together. Allow the solution a dwell time of 15 to 30 minutes to penetrate microscopic substrate pores and reduce residual fungal contamination.
- Scrub the Channel: Use a stiff nylon-bristled detail brush to scrub deep inside the 90-degree corner joint, dislodging any hidden fungal material.
- Rinse and Decontaminate: Wipe the area clean with fresh water and clean microfiber towels.
- Complete 24-Hour Drying: Moisture is the enemy of silicone adhesion. Allow the joint to dry completely for a full 24 hours. Run the onboard air conditioning or place an electric fan directly facing the open seam to help remaining moisture evaporate from inside the gap.
Step 3: Apply 100% Silicone for Mold Removal Shower Caulk Longevity
Selecting the correct sealant chemistry improves long-term resistance in harsh, humid marine environments. Never use standard acrylic or latex caulks in a marine head; these products contain organic compounds that fungi can use as a food source.
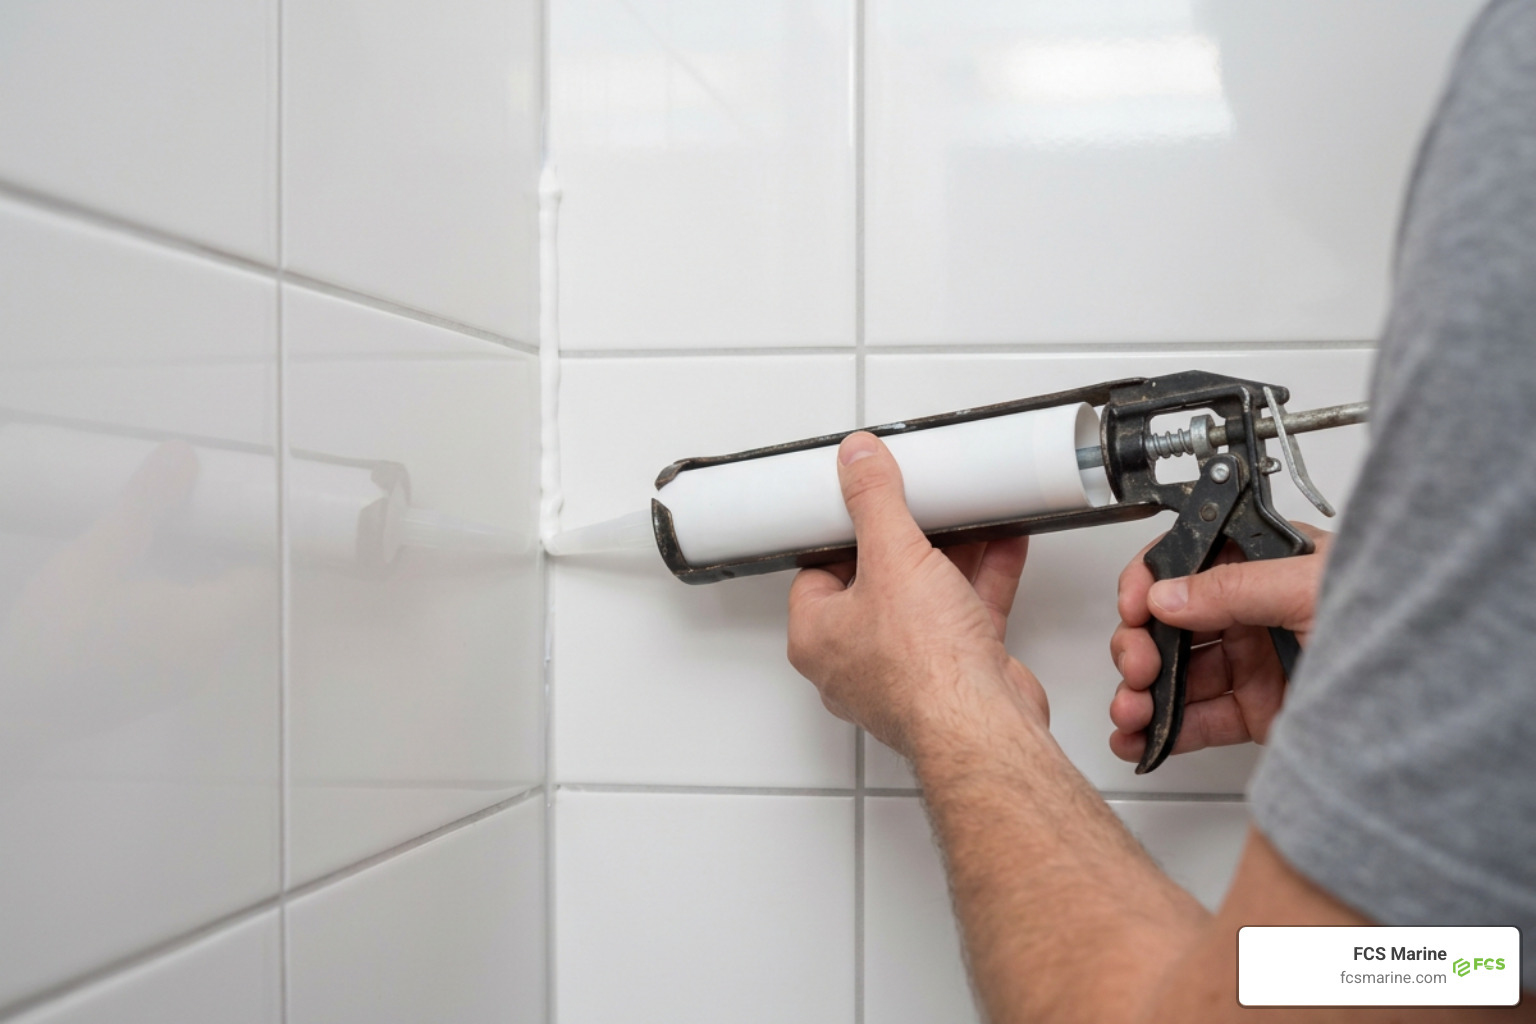
Choose high-quality 100% sanitary silicone formulated with mildew-resistant additives for wet sanitary areas. Industry discussions of antimicrobial biocide sealant research explain how integrated fungicides are used to interfere with fungal growth on caulk surfaces.
- Prepare the Cartridge: Cut the caulk nozzle tip at a 45-degree angle to create an opening that matches the width of your shower seam, typically 1/8 to 1/4 inch.
- Lay a Continuous Bead: Place the nozzle against the joint and apply smooth, steady pressure on the caulk gun trigger. Pull the gun toward you in a single, unbroken motion, ensuring the sealant fills the void completely without leaving internal air pockets.
- Tool the Bead: Smooth the newly applied bead within 5 to 10 minutes before the silicone begins to form a skin. Use a silicone smoothing tool or a gloved finger dipped in a mild soapy water solution to press the sealant firmly into the joint, creating a clean, concave profile that sheds water effectively.
- Respect Full Cure Time: While quality silicone forms an exterior skin within 20 to 30 minutes, it requires a full 24 to 48 hours to cure completely. Keep the shower dry throughout this curing window.
Preventive Maintenance and Temporary Fixes for Shower Caulk
Proper daily habits extend the service life of marine shower caulking and prevent fungal colonies from taking hold:
- Squeegee After Every Shower: Use a small rubber squeegee to wipe down shower walls and caulk lines immediately following use, removing standing surface water before it can sit against the seam.
- Extend Exhaust Fan Operation: Run onboard head blowers or exhaust fans after shower use until the compartment feels noticeably drier and less humid.
- Weekly Preventive Mist: Lightly spray caulk seams once a week with a 50/50 mix of distilled water and white vinegar to make the surface less hospitable for spores.
- Maintain Vessel HVAC Systems: Ensure marine air conditioning systems are running efficiently to control ambient cabin humidity, especially during hot, humid South Florida summers.
When extensive moisture issues spread beyond shower seams into bulkheads, headliners, or cabin ducting, professional Marine Mold Remediation & Yacht Sanitization becomes necessary to fully restore interior air quality and safeguard vessel value.
Frequently Asked Questions About Shower Mold Remediation
Why does mold keep returning on shower caulk even after bleaching?
Standard household bleach is an aqueous solution containing mostly water. When applied to porous surfaces like aging silicone, the chlorine oxidizes surface stains but cannot penetrate deep into the material. The remaining water feeds the surviving fungal roots, called hyphae, causing dark mold spots to reappear quickly.
How can you tell if mold is growing underneath the caulk?
If the caulk line feels spongy to the touch, pulls away from the wall with minimal pressure, or shows dark black staining from behind that does not lighten after surface cleaning, water and mold have breached the seal. The entire bead must be removed and the seam dried before recaulking.
What caulk helps prevent mold regrowth in wet areas?
A practical sealant for marine showers is 100% kitchen-and-bath silicone containing integrated mildewcides. Look for formulas specifically rated for high-moisture sanitary environments, as they create a non-porous, waterproof barrier that helps deny mold the moisture and nutrients it needs to grow.
Conclusion
Restoring moldy shower caulk requires addressing the underlying moisture barrier rather than continually wiping surface stains. By stripping deteriorated silicone, thoroughly disinfecting the substrate, and laying a clean bead of 100% mold-resistant marine-grade silicone, vessel owners can enjoy a fresh, clean, and hygienic head compartment. To keep all your onboard surfaces looking pristine, review our guide on how to clean silicone sealant like a pro for ongoing care tips.
When onboard moisture challenges extend beyond the shower seam, FCS Marine provides reliable, mobile marine service across South Florida. Our team travels directly to where your vessel is located throughout Palm Beach County, Broward County, Miami-Dade County, Martin County, St. Lucie County, Fort Lauderdale, and Pompano Beach, resolving complex marine air conditioning, refrigeration, and sanitation issues on-site. Contact FCS Marine today to schedule your vessel service and keep your yacht operating smoothly.