Mold on Silicone Sealant: What It Is and How to Deal With It
The fastest way to remove mold from silicone is to apply a cleaning solution, let it dwell, then scrub and rinse. Here are your four main options, from gentlest to strongest:
- Baking soda paste – Mix 2-3 teaspoons with water, apply, leave 5-10 minutes, scrub, rinse
- White vinegar or hydrogen peroxide – Spray on, leave 30-60 minutes, scrub, rinse thoroughly
- Diluted bleach poultice – Soak paper towels in 1 tbsp bleach per gallon of water, press onto mold overnight, rinse
- Commercial mold remover – Apply per product instructions for deep or stubborn stains
If the mold has penetrated deeply or the sealant is cracking or peeling, replacement is a better option than cleaning.
You’ve seen it before. Those dark black streaks creeping along the silicone bead in your shower or around the sink. It looks bad, and it’s not great for your health either.
On a yacht, it’s even more of a headache. Warm, humid conditions below deck make silicone sealant a prime target for mold. And once it takes hold, it spreads fast.
The good news? Most mold on silicone sealant can be removed without professional help — as long as it hasn’t penetrated too deeply into the material. Poor ventilation is behind around 60-70% of mold problems on sealants, which means a few simple habits can stop it coming back after you’ve cleaned it.
This guide walks you through every method, from a cheap baking soda paste to overnight bleach treatments, so you can pick the right approach for how bad the problem is.
Why Mold Grows on Silicone Surfaces
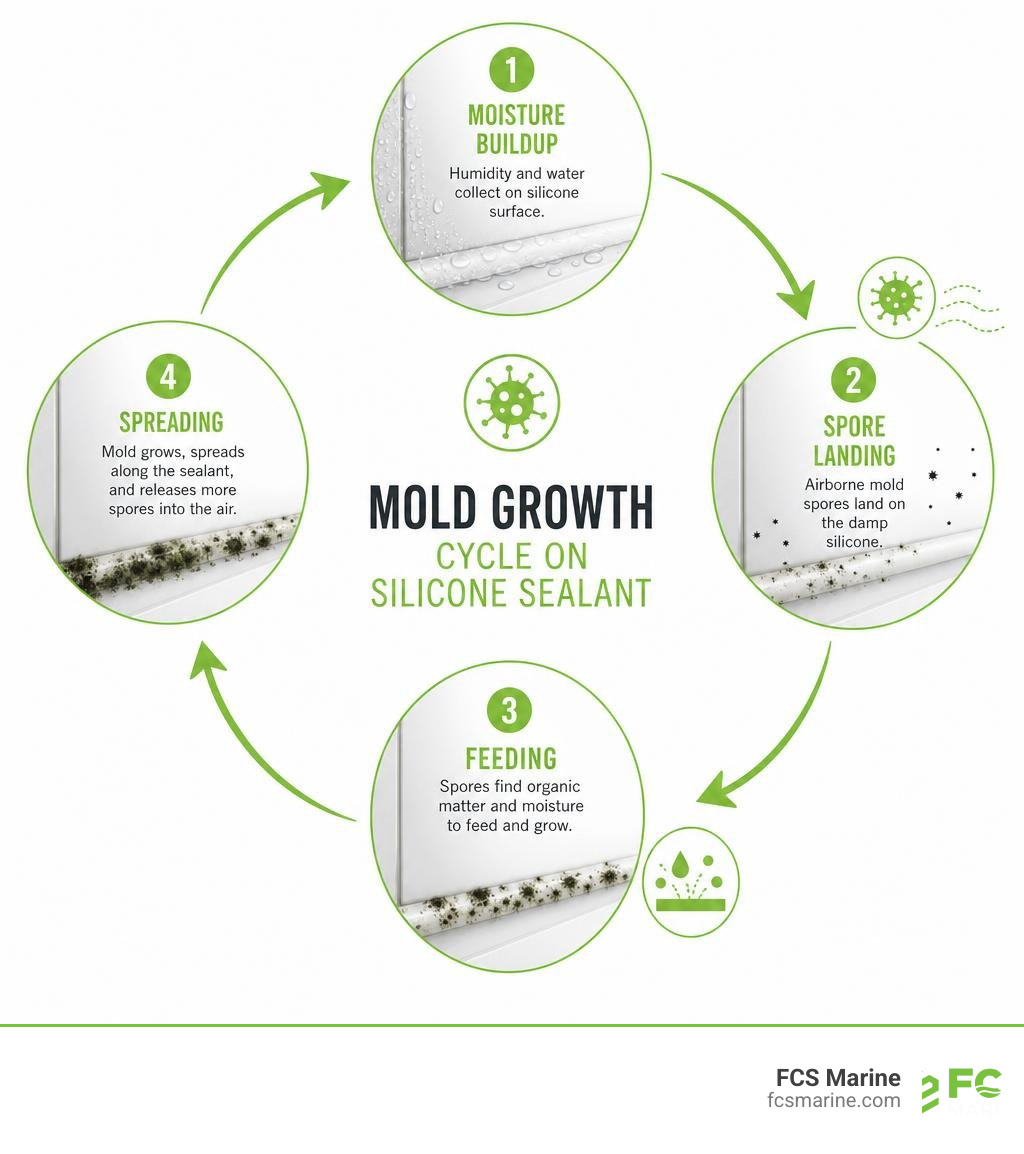
To successfully remove mold from silicone, it helps to understand why it chose that spot in the first place.
Silicone is highly valued in bathrooms, kitchens, and marine vessels because it is incredibly water-resistant and flexible. However, being water-resistant is not the same as being mold-proof. While pure silicone itself does not provide nutrients for fungi, the environment around it certainly does.
Over time, several factors come together to create a perfect breeding ground:
- Microscopic Pores: Although silicone feels smooth, it can develop microscopic pores and tiny tears as it ages or degrades. These microscopic pockets trap moisture and organic matter.
- Organic Food Sources: Mold does not actually eat the silicone. Instead, it feeds on the film of soap scum, skin cells, body oils, and household dust that naturally settles along the sealant lines.
- High Humidity and Stagnant Air: Mold spores are constantly floating in the air. When they land on a damp silicone bead in a poorly ventilated space, they quickly take root.
It is also important to understand exactly what is growing on your seals. For a deeper dive into distinguishing different types of fungal growth, check out our guide on Mildew vs Mold.
Because corners and transitions dry last, they are almost always the first places where you will notice those unsightly black spots forming. If left unaddressed, the mold will begin to work its way underneath the silicone bead, eventually breaking the watertight seal entirely.
How to Remove Mold from Silicone: 4 Proven Methods
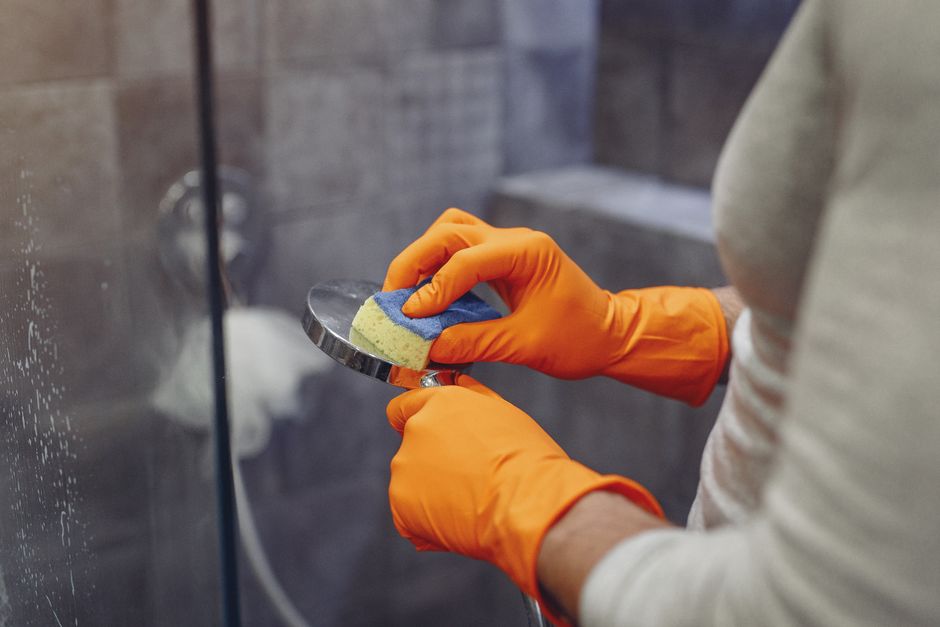
Before you start scrubbing, you need to prepare your workspace and gather your gear. Mold remediation requires a few basic safety precautions to protect your lungs and skin from airborne spores and harsh cleaning chemicals.

Always equip yourself with:
- Rubber gloves to protect your hands from chemicals and direct mold contact.
- A face mask (preferably an N-95) to avoid inhaling released spores.
- Protective goggles to shield your eyes from chemical splashes.
- Good ventilation by opening nearby hatches, portlights, or running exhaust fans.
To help you decide which approach to take, here is a quick comparison of the most popular methods:
| Method | Best For | Pros | Cons |
|---|---|---|---|
| Baking Soda Paste | Light surface mold & deodorizing | Inexpensive, non-toxic, safe on all silicone | Requires physical scrubbing |
| Natural Sprays (Vinegar/Peroxide) | Mild to moderate mold | Kills spores at the root, eco-friendly | Needs longer dwell times (30-60 mins) |
| Diluted Bleach Poultice | Stubborn, deep-set black stains | Extremely effective at bleaching dark stains | Can degrade silicone over time if used too often |
| Commercial Mold Gels | Vertical surfaces & severe cases | Clings to vertical beads, professional-strength | Strong chemical odors, more expensive |
Using Baking Soda to Remove Mold from Silicone
Baking soda (bicarbonate of soda) is an outstanding, highly affordable kitchen staple that acts as a mild abrasive and natural disinfectant. It is completely safe for all types of silicone and will not cause the material to break down or discolor.
To use this method effectively:
- Mix the Paste: Combine 2 to 3 teaspoons of baking soda with a small amount of room-temperature water in a small dish to form a thick, spreadable paste.
- Apply: Wearing your rubber gloves, spread the paste generously over the moldy sections of the silicone.
- Seal with Cling Film: Press a strip of plastic wrap (cling film) directly over the paste. This locks in the moisture and prevents the paste from drying out too quickly, allowing it to work longer.
- Dwell Time: Let it sit for at least 10 to 15 minutes. For heavier stains, you can leave it on for up to an hour.
- Scrub: Remove the plastic wrap and use an old, soft-bristled toothbrush to scrub the silicone in gentle, circular motions. Avoid using stiff wire brushes, which can slice or tear the sealant.
- Rinse and Dry: Rinse the area thoroughly with cold water and a sponge. Dry the surface completely with a clean towel.
For more details on why this simple kitchen trick works so well, you can read about the Baking Soda Method.
Natural Sprays to Remove Mold from Silicone
If you prefer a hands-off spraying approach without resorting to harsh synthetic chemicals, white vinegar and hydrogen peroxide are your best options.
White vinegar contains acetic acid, which is highly effective at killing roughly 82% of mold species. Hydrogen peroxide (use a standard 3% household concentration) is an oxidizer that destroys mold spores and breaks down organic biofilms.
To apply this natural treatment:
- Prepare the Spray: Fill a clean spray bottle with undiluted white vinegar or 3% hydrogen peroxide. Note: Never mix vinegar and hydrogen peroxide in the same bottle, as they can form hazardous peracetic acid.
- Apply Generously: Spray the solution directly onto the moldy silicone until it is completely saturated.
- Let It Dwell: Allow the solution to sit for at least 30 to 60 minutes. Keep a close eye on it; if it starts to dry out, spray a little more to keep the surface damp.
- Scrub and Rinse: Scrub the crevices gently with a soft brush, then rinse thoroughly with warm water.
- Dry Completely: Use a microfiber cloth to wipe away all remaining moisture.
For a step-by-step breakdown of natural alternatives, refer to this Vinegar and Hydrogen Peroxide Guide.
Diluted Bleach Poultice for Stubborn Stains
When natural remedies fail to lift deep, dark black mold stains, a diluted bleach poultice is the ultimate DIY solution. This method uses sodium hypochlorite to break down the mold’s cellular structure and lift the stubborn pigment.
However, a word of caution: never use straight, undiluted bleach on silicone. Concentrated bleach is highly corrosive. Over time, it will degrade the silicone polymer, making it brittle, prone to cracking, and creating even more microscopic crevices for future mold to inhabit.
To safely execute a bleach poultice:
- Dilute the Bleach: Mix 1 tablespoon of household liquid bleach into one gallon of water (or create a slightly stronger 1:10 water-to-bleach solution for very severe stains).
- Create the Poultice: Soak cotton balls, beauty coils, or rolled-up paper towels in the diluted solution.
- Apply and Press: Press the wet paper towels directly onto the moldy silicone sealant. Ensure they cling tightly to the surface so the solution remains in constant contact with the mold.
- Let It Sit: Leave the poultice in place for several hours, or overnight for the most stubborn black stains.
- Rinse and Inspect: Remove the paper towels, discard them safely, and rinse the silicone thoroughly with clean water to remove all chemical residues. Dry the area completely.
Commercial Silicone Mold Removers
If household remedies aren’t cutting it, professional-grade commercial silicone mold removers are widely available. These are typically formulated as thick, viscous gels rather than runny liquids.
The primary advantage of gel-based chemical agents is their ability to cling to vertical surfaces — such as shower walls or deep galley backsplashes — without running off. This ensures the active ingredients stay exactly where they are needed for the entire duration of the required dwell time.
Always follow the manufacturer’s instructions carefully, wear your safety gear, and ensure maximum ventilation while these heavy-duty chemicals are at work.
Clean vs. Replace: When Has Mold Penetrated Too Deeply?
There comes a point in every battle against mold where cleaning is no longer effective. Because silicone can become porous once its chemical integrity is compromised, mold can actually grow through the sealant, taking root between the back of the bead and the wall or tile joint.
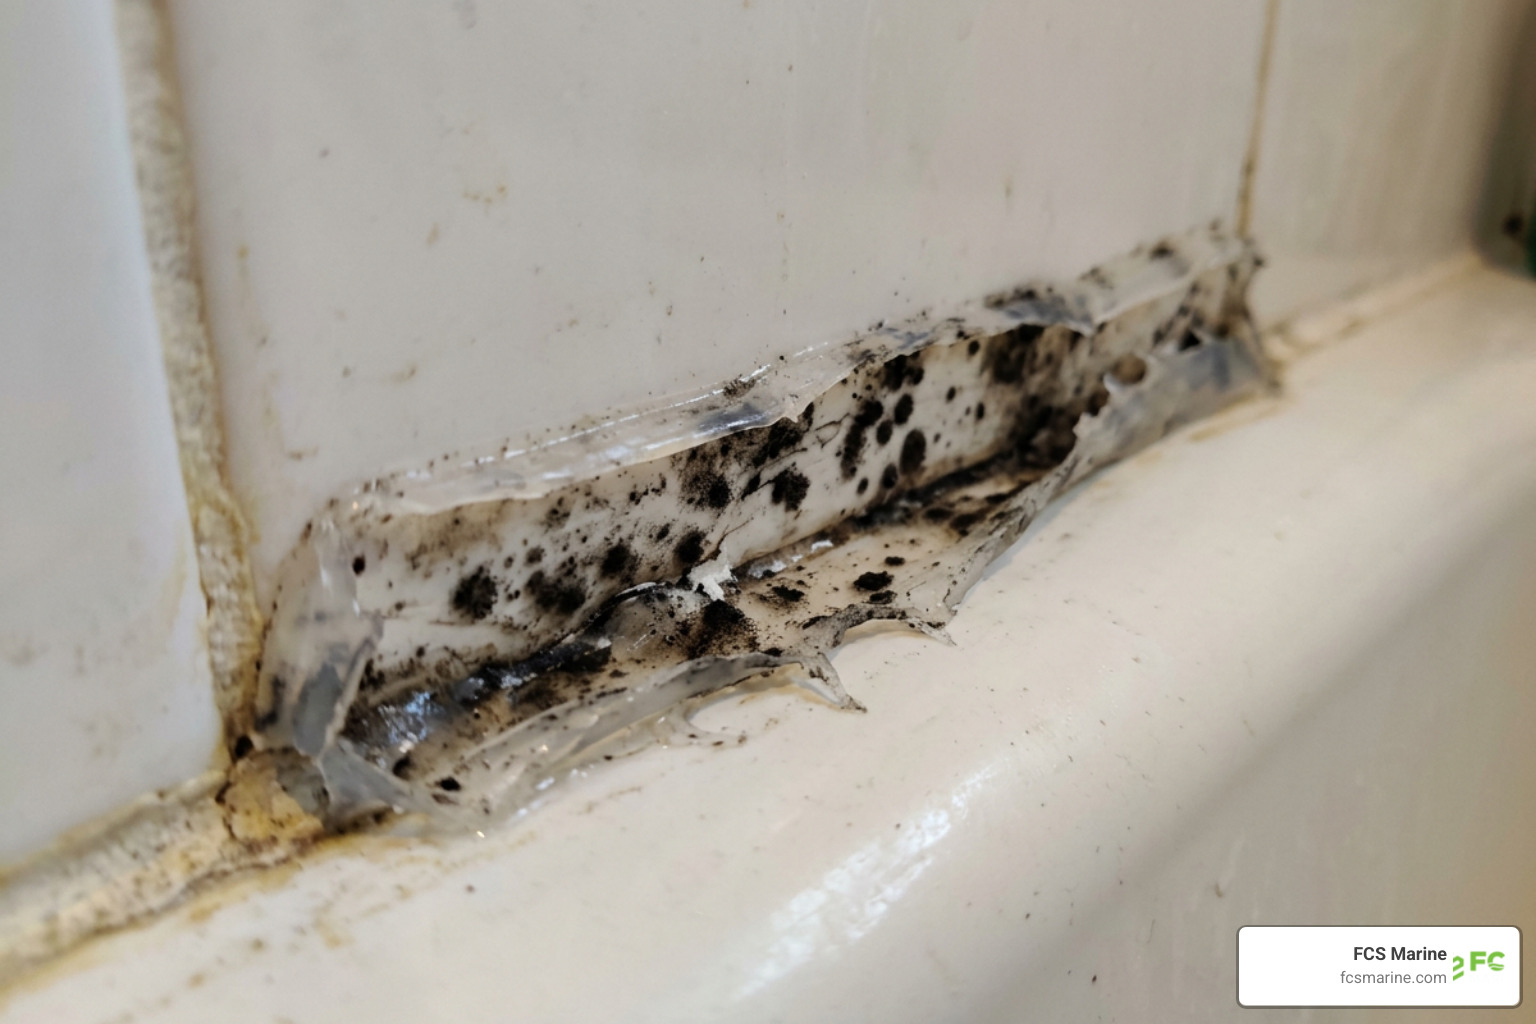
If the mold has managed to get behind the sealant, no amount of surface scrubbing or bleach soaking will kill it. The black spots will simply return a few days after cleaning. In these cases, attempting to clean the surface is a temporary band-aid; the only permanent solution is to completely remove and replace the sealant.
To understand more about evaluating the structural state of your sealant, you can read about Evaluating Sealant Damage.
Signs Your Silicone Sealant Needs Replacement
Keep an eye out for these clear indicators that your silicone has reached the end of its lifespan:
- Sealant Separation: The edges of the silicone bead are lifting away from the tile, tub, or fiberglass surface, creating a visible gap where water can pool.
- Cracking and Peeling: The silicone feels brittle, stiff, or is actively peeling off in strips.
- Deep, Unresponsive Stains: You have tried the bleach poultice or commercial gel methods, and the dark black spots remain completely unchanged.
- Squishy or Soft Spots: Pressing on the sealant feels soft or hollow, indicating that water has bypassed the bead and is rotting the drywall, wood, or backing material behind it.
Best Practices for Preventing Mold on Silicone Sealant
Once you have successfully cleaned your silicone — or gone through the effort of replacing it — you want to make sure the mold doesn’t return. Implementing a few simple maintenance habits will save you hours of scrubbing down the road:
- Use a Squeegee: After every shower or heavy water exposure, use a small squeegee or a dry microfiber towel to wipe down the silicone joints. Removing standing water cut off the moisture mold needs to grow.
- Improve Ventilation: Run your bathroom exhaust fan during your shower and leave it running for at least 10 to 15 minutes afterward. If you are on a vessel, open hatches or use low-draw cabin fans to keep air moving.
- Keep Indoor Humidity Low: Aim to keep indoor humidity levels between 30% and 50%.
- Tool a Concave Bead: If you are applying new silicone, tool the bead so it has a slightly concave (curved inward) profile. Flat or convex beads can create tiny “grime ledges” where water pools. A concave shape allows water to naturally shed off the seam.
- Weekly Maintenance: Spray the silicone once a week with a mild, natural mold inhibitor like diluted white vinegar to kill any newly landed spores before they can colonize.
Frequently Asked Questions about Silicone Mold
Is mold on silicone dangerous to my health?
Yes. While the common black spots on silicone are not always the highly toxic Stachybotrys chartarum, any mold growth in an enclosed space can negatively impact indoor air quality. Mold releases microscopic spores and volatile organic compounds into the air, which can trigger asthma attacks, allergic reactions, nasal congestion, and skin irritation — especially in sensitive individuals, children, or those spending long periods in confined cabin spaces.
Can I use straight bleach on silicone caulk?
We strongly advise against using straight, undiluted bleach. While it will turn the mold white very quickly, concentrated sodium hypochlorite breaks down the polymer structure of the silicone. This causes the sealant to shrink, crack, and become brittle over time. Always dilute bleach (at least 1 tablespoon per gallon of water) or use a specialized, buffered commercial product designed specifically for silicone.
How often should I clean silicone to prevent mold?
For high-moisture areas like showers or marine heads, we recommend a quick wipe-down after every use. A deeper, preventative clean — such as spraying the silicone with a diluted vinegar solution — should be integrated into your weekly or bi-weekly cleaning routine. Keeping up with light, regular maintenance is infinitely easier than trying to scrub away deeply embedded mold stains later.
Conclusion
Whether you are dealing with a stubborn shower corner at home or maintaining the pristine interior of a luxury vessel, knowing how to safely remove mold from silicone is key to preserving both the beauty and the structural integrity of your space.
However, we know that mold remediation can sometimes feel like an endless uphill battle — especially in the humid, tropical climate of South Florida. When mold becomes a recurring nightmare, or if it has spread beyond a simple DIY fix, it is always best to bring in the professionals.
At FCS Marine, we are a family-owned South Florida company specializing in premium yacht maintenance services. From professional mold cleaning and marine AC repair to insulation and water purification, we bring expert care directly to your slip. We proudly serve boat owners across Palm Beach County, Broward County, Miami-Dade County, Martin County, and St. Lucie County, including Fort Lauderdale and Pompano Beach, FL.
Our signature USP is fast, dockside service backed by a 100% satisfaction guarantee. If you are ready to hand the hard work over to the experts, learn more about our professional Yacht Mold Removal services and let us get your vessel back to its clean, healthy, and pristine condition today!