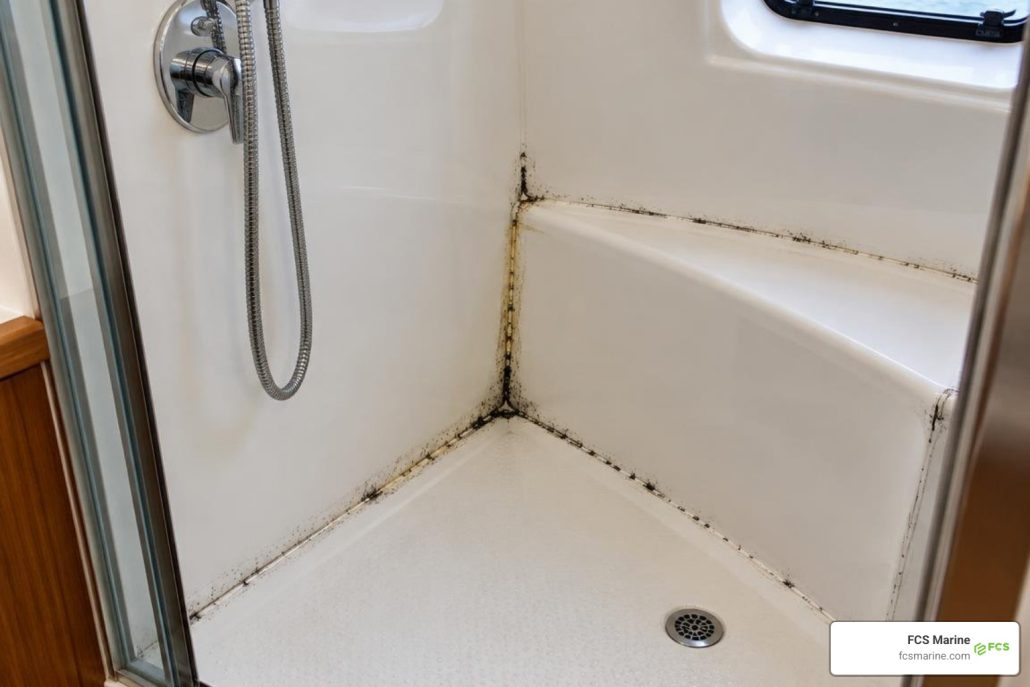
Cleaning Mold from Silicone Sealant: Start with the Surface
For cleaning mold from silicone sealant, first wipe away soap scum with warm, soapy water. Apply undiluted white vinegar to the moldy seam and leave it for at least 30 minutes. Gently scrub with a soft toothbrush, then rinse and dry the area. If dark marks remain beneath the silicone, or the sealant is lifting or cracked, replace the bead rather than cleaning it again.
In a South Florida yacht shower, moisture can linger along seams and let mold return. FCS Marine provides on-site marine mold cleaning at vessel locations, including marinas and private docks, when the problem needs professional attention.
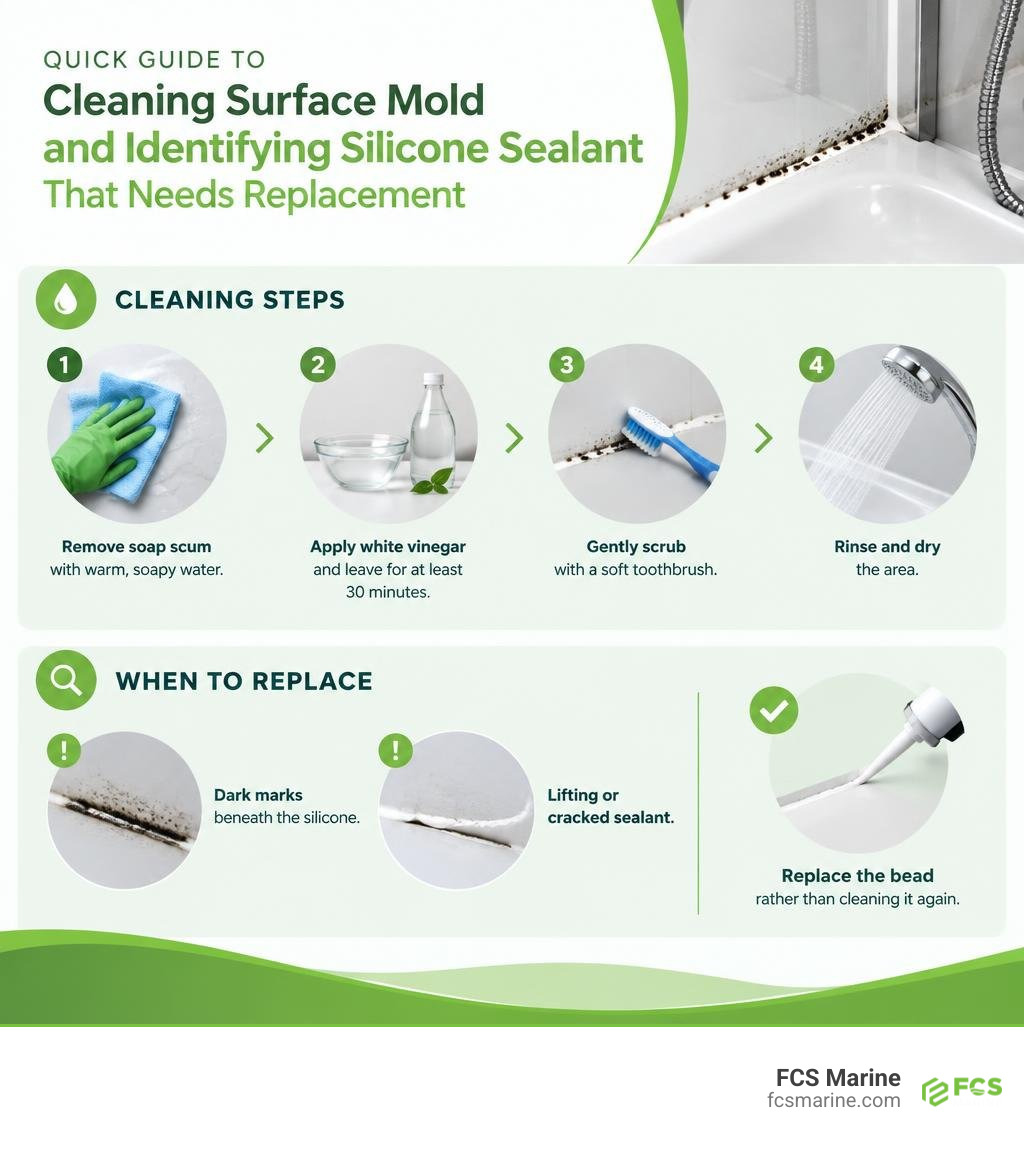
Terms related to cleaning mold from silicone sealant:
Understanding Why Mold Thrives on Silicone Sealant in High-Humidity Environments
Mold growth on silicone caulk is one of the most frustrating challenges faced by property managers, yacht captains, and homeowners alike. While 100% silicone sealant is inherently water-resistant, it is not completely impervious to biological growth over time.
Microscopic fungal spores drift through the air constantly. When these spores settle on wet surfaces where the relative humidity exceeds 60%, they begin to colonize. Wet areas like residential bathrooms, commercial galleys, and yacht heads provide the three primary ingredients mold needs to thrive: warmth, sustained moisture, and an organic food supply.
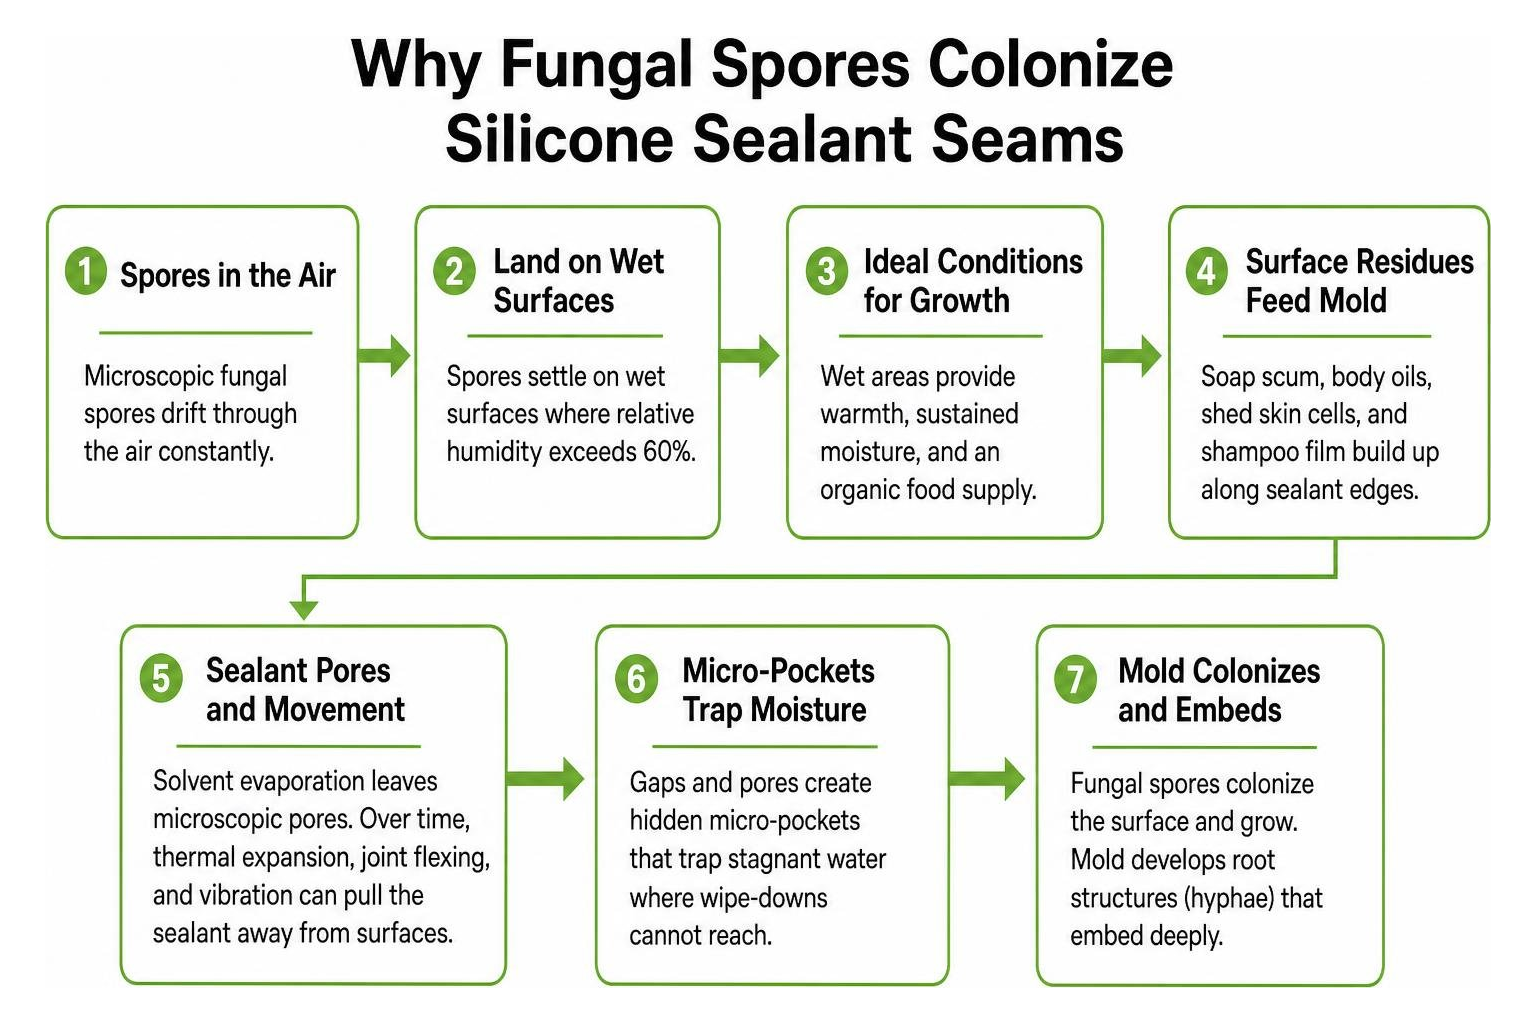
Although silicone polymer does not serve as a direct food source, daily use leaves behind layers of organic residues—including soap scum, body oils, shed skin cells, and shampoo film. When these residues accumulate along the edges of the sealant, mold takes root across the surface.
Furthermore, traditional silicone sealants often contain solvents that evaporate during the curing process, leaving behind microscopic surface pores. Over years of thermal expansion, joint flexing, and vibration—especially prevalent in marine vessels operating in South Florida—sealant beads can stretch and pull away slightly from tile, fiberglass, or stone substrates. This creates hidden micro-pockets that trap stagnant water where standard wipe-downs cannot reach. Understanding the difference between mildew vs mold is essential: while mildew forms a flat, powdery surface dusting that wipes away easily, mold develops root structures (hyphae) that embed deeply into porous matrices.
Proven Methods for Cleaning Mold from Silicone Sealant
Before treating any moldy silicone seam, preparation and safety are vital. Always wear protective rubber gloves, safety glasses, and a particulate mask to avoid inhaling disturbed fungal spores or strong cleaning fumes. Ensure the space is well ventilated by opening hatches or windows and running exhaust fans.
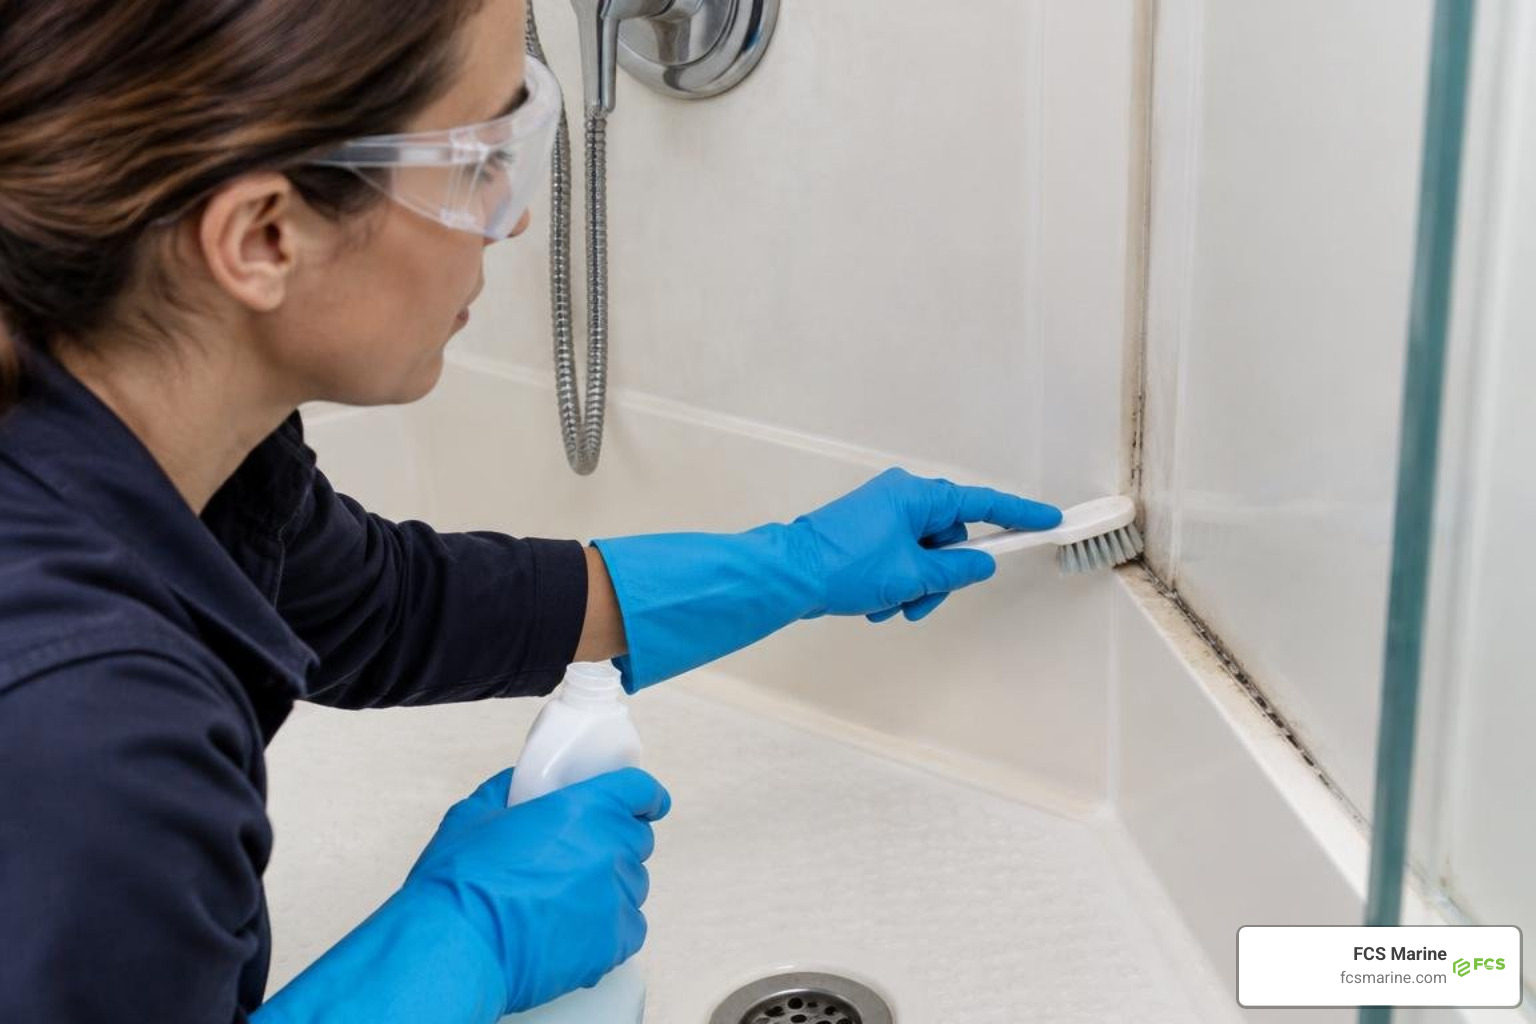
Always begin by washing away surface grime and grease using warm water and a degreasing dish soap. Attempting to apply mold treatments over a barrier of soap scum reduces the chemical contact with the fungal spores beneath.
Essential DIY Steps for Cleaning Mold from Silicone Sealant with Natural Remedies
For early-stage surface mold, natural kitchen staples provide an effective, non-toxic alternative to harsh chemicals. Undiluted distilled white vinegar contains mild acetic acid (typically 5% concentration), which naturally penetrates porous boundaries to disrupt fungal cellular structures.
- Spray the Area: Spray undiluted white vinegar directly onto the affected silicone bead until saturated.
- Allow Dwell Time: Let the vinegar sit undisturbed for at least 30 minutes to one hour, allowing the acid to work into surface irregularities.
- Scrub Gently: Use an old, soft-bristled toothbrush to scrub the seam gently. Avoid using wire brushes, steel wool, or abrasive scouring pads, as these will scratch the silicone and create micro-grooves that accelerate future mold growth.
- Apply a Baking Soda Paste: For persistent stains, mix 2 to 3 tablespoons of bicarbonate of soda with just enough water or vinegar to form a thick paste. Baking soda acts as a mild abrasive and odor neutralizer. According to cleaning guides highlighting budget-friendly kitchen remedies, leaving this paste on the seam for 5 to 10 minutes (or covering it with plastic wrap to prevent drying) lifts embedded discoloration without degrading the sealant.
- Rinse and Dry: Rinse the joint thoroughly with clean, warm water and dry it completely with a microfiber cloth. For additional step-by-step techniques, review our guide on cleaning shower caulk effectively.
Using Hydrogen Peroxide and Chemical Poultices for Cleaning Mold from Silicone Sealant
When natural acids are insufficient for heavy black mold staining, oxygen-based oxidizing agents and targeted poultices offer stronger cleaning action.
- 3% Hydrogen Peroxide: Spray standard 3% hydrogen peroxide directly onto the moldy sealant and let it sit for 10 to 15 minutes before scrubbing and rinsing. Peroxide lifts surface staining via effervescence (bubbling oxidation) without releasing harmful fumes.
- Bleach-Soaked Paper Poultice: Liquid bleach often runs off vertical seams before it can work. To create a poultice, roll strips of paper towels or cotton coils, soak them in household liquid bleach (sodium hypochlorite), and press them firmly against the moldy silicone joint. Leave the poultice in place for 6 to 8 hours (or overnight), then remove, rinse thoroughly, and dry. Refer to established commercial mold removal guides for detailed chemical handling best practices.
Safety Warning: Never mix chlorine bleach with vinegar, ammonia, or any other household cleaners. Combining these substances generates toxic chlorine or chloramine gas, which can cause severe respiratory injury.
Sanitizing Removable Silicone Molds and Food-Grade Seals with High Heat
For removable silicone components—such as galley baking molds, refrigerator door gaskets, or food-grade storage rings—heat sterilization is an exceptionally reliable method. High-quality silicone rubber withstands sustained temperatures up to 450°F to 500°F (232°C to 260°C) without melting or structural degradation.
- Boiling Water: Submerge heat-safe silicone items in boiling water for 10 minutes to eradicate fungal spores and neutralize stale odors.
- Dry Heat Oven Method: Place thoroughly cleaned, oven-safe silicone bakeware in an oven preheated to 350°F–400°F for 15 to 20 minutes to eliminate deep-seated spores within the silicone pores.
- Dishwasher Sanitization: Run removable silicone seals through a dishwasher cycle featuring a high-temperature NSF-certified sanitize rinse. For more tips on food-contact surfaces, see our guide on safe kitchen sanitization practices.
| Cleaning Agent | Recommended Dwell Time | Best Suited For | Advantages | Limitations |
|---|---|---|---|---|
| White Vinegar | 30 to 60 minutes | Light-to-moderate surface mold | Non-toxic, natural penetration, inexpensive | Strong smell, requires longer contact time |
| Baking Soda Paste | 5 to 20 minutes | Surface stains and soap scum | Mild abrasive, absorbs odors, non-caustic | Requires physical scrubbing, messy to rinse |
| 3% Hydrogen Peroxide | 10 to 15 minutes | Moderate fungal spotting | Fume-free, bleaches stains via oxidation | May lighten colored surfaces if unmonitored |
| Bleach Poultice | 6 to 8 hours (overnight) | Heavy, stubborn black mold | Fast stain bleaching, high surface lethality | Corrosive over repeated use, harsh fumes |
Clean or Replace: How to Identify Deeply Infiltrated Sealant
Not all moldy silicone can—or should—be saved. Because silicone is flexible, fungal hyphae can work their way underneath the sealant bead or grow through microscopic tears in aged caulk.
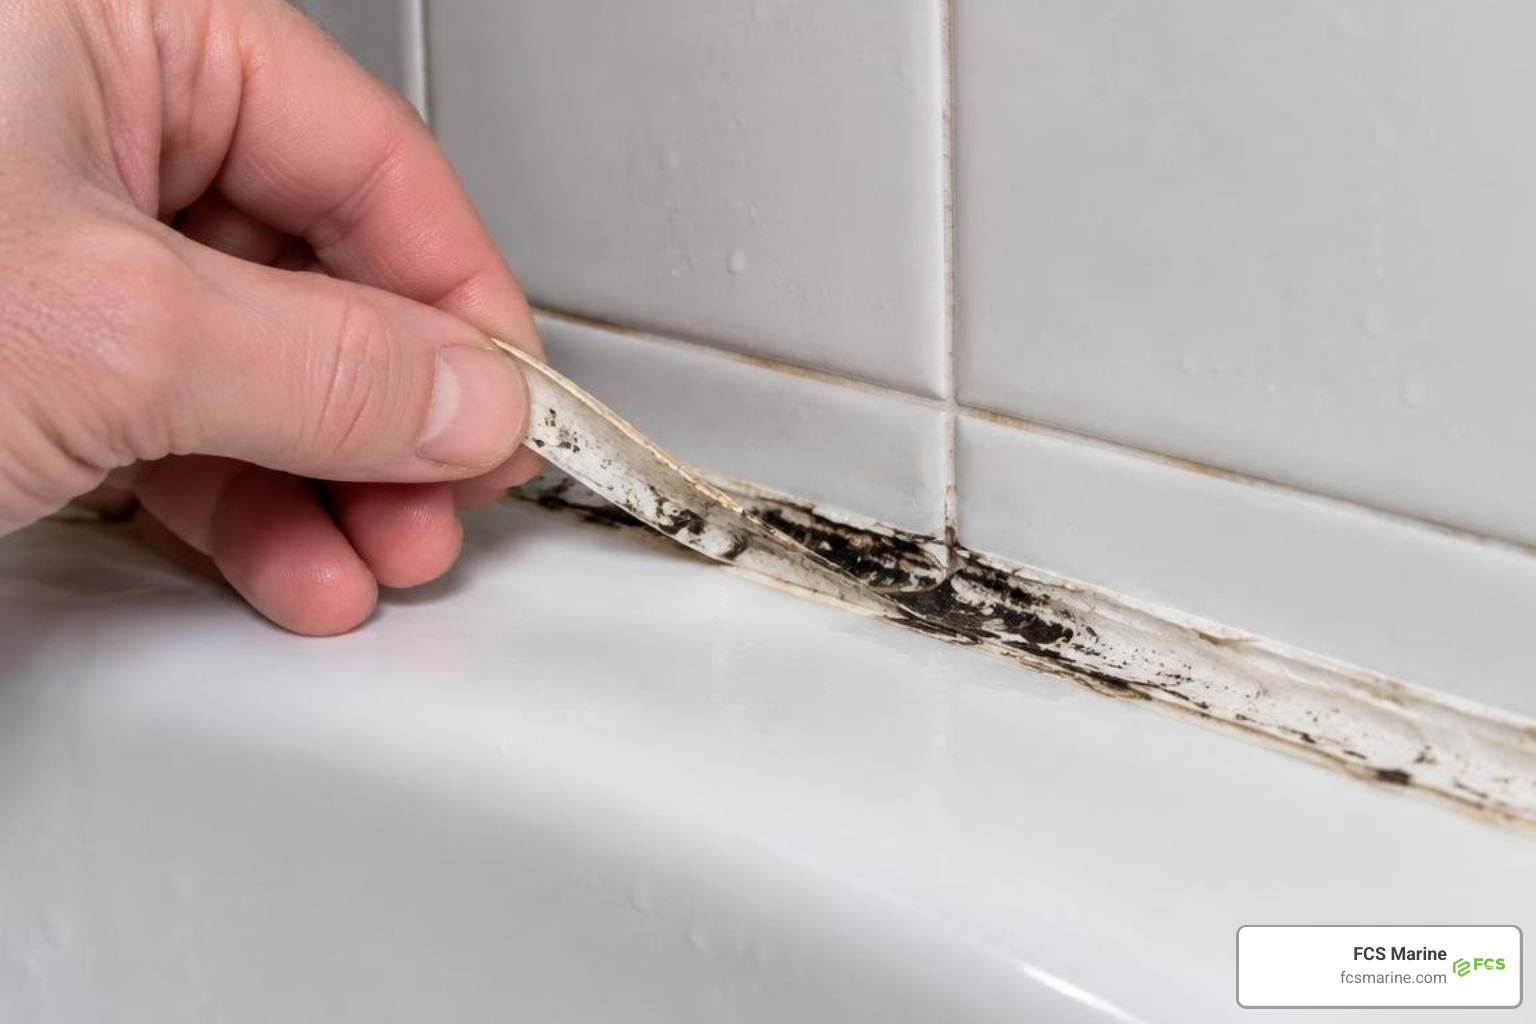
Conduct a quick 2-minute physical inspection to determine whether your sealant needs cleaning or complete replacement:
- Wipe Test: Clean the surface with soapy water. If dark black or brown shadowing remains visible inside the body of the silicone rather than on the outer face, the mold has penetrated the polymer matrix.
- Adhesion Check: Gently run a fingernail or plastic scraper along the edges of the bead. If the silicone has pulled away from the wall, tile, or fiberglass, water is trapped behind the seam.
- Texture Assessment: Healthy cured silicone is resilient and firm. If the sealant feels mushy, gummy, or brittle and cracked, the polymer has degraded.
When fungal growth is trapped behind or within the silicone, continuous chemical scrubbing will only temporarily lighten the surface while the underlying colony continues to spread. In these instances, following step-by-step DIY silicone replacement advice is the only permanent solution.
Step-by-Step Guide to Removing and Replacing Damaged Silicone
Replacing mold-infested caulk ensures a fresh, watertight barrier that protects structural substrates from hidden rot and moisture damage.
- Cut Away the Old Bead: Use a specialized caulk removal tool or a plastic scraper to slice through the old silicone along both edges of the joint. Carefully peel the entire bead away from the seam.
- Dissolve Residual Silicone: Apply a commercial silicone softening gel or solvent to stubborn remnants and wait 15 to 60 minutes. Scrape away softened residue using a non-marring plastic blade.
- Disinfect the Open Joint: Clean the gap thoroughly with isopropyl alcohol or methylated spirits to eliminate remaining grease, moisture, and latent mold spores. Let the joint air dry completely.
- Apply Mold-Resistant Sealant: Choose a 100% sanitary silicone containing active fungicides (such as formulations rated for 10-year or lifetime mold protection and Class 35 or Class 50 joint movement). Cut the tube nozzle at a 45-degree angle to match the gap width and apply a smooth, continuous bead.
- Tool the Joint: Tool the bead immediately using a silicone profile tool or a gloved finger dipped in mild soapy water to create a slightly concave shape that sheds water efficiently.
- Allow Full Cure Time: While many modern sealants are water-ready in 30 to 60 minutes, allow 24 to 72 hours for full cross-link curing before exposing the seam to heavy humidity or scrubbing. For cost-effective methods, explore our overview on budget-friendly shower silicone removal.
Long-Term Prevention Strategies for Marine Heads and Bathrooms
Once your silicone seams are clean and sealed, consistent preventative maintenance stops mold spores from taking hold again.
- Squeegee After Every Use: Remove standing water droplets from shower walls and sealant joints immediately after bathing to deny mold the moisture it requires.
- Maximize Airflow and Ventilation: Run mechanical exhaust fans for at least 20 to 30 minutes following hot showers. In marine environments, keep head doors and overhead hatches open when possible to promote cross-ventilation.
- Rinse Soap Residue: Wash away residual soap, body wash, and shampoo films from corners and perimeter caulk lines before leaving the stall.
- Conduct Monthly Inspections: Check corner transitions, drain seams, and countertop junctions monthly for early signs of peeling, pinpoint black spots, or compromised adhesion. Following a practical maintenance guide for shower caulk keeps wet areas sanitary throughout the year.
Frequently Asked Questions about Cleaning Silicone Mold
Can bleach permanently damage silicone sealant over time?
Yes. While an occasional diluted bleach application is effective for removing stubborn surface stains, repeated or concentrated use breaks down the elasticity and adhesion of silicone polymers, causing the caulk to become brittle, discolored, and prone to cracking.
How do I know if black mold has grown beneath or inside the caulk?
If a silicone bead has been thoroughly cleaned with vinegar, baking soda, or a bleach poultice and distinct dark patches or “shadowing” remain visible beneath a smooth outer surface, the fungal hyphae have penetrated into the polymer or established a colony behind a detached seam.
How long should cleaning agents sit on moldy silicone before scrubbing?
Undiluted white vinegar should dwell for 30 to 60 minutes. Baking soda pastes require 5 to 20 minutes, 3% hydrogen peroxide works best when left for 10 to 15 minutes, and bleach-soaked paper poultices are typically applied for 6 to 8 hours for deep stain removal.
What is the best type of silicone to prevent mold recurrence?
Use a 100% silicone sanitary sealant formulated specifically for kitchen, bath, and marine wet-area applications that incorporates embedded fungicides and meets ASTM C920 flexibility standards to handle joint expansion and contraction.
Conclusion: Keeping Your Vessel and Home Sanitary
Maintaining mold-free silicone sealant preserves aesthetic appeal, structural integrity, and indoor air quality. When moisture, heat, and high humidity converge—especially across South Florida’s coastal climate—routine cleaning habits make all the difference.
For yacht owners, captains, and vessel operators across Palm Beach County, Broward County, Miami-Dade County, Martin County, St. Lucie County, Fort Lauderdale, and Pompano Beach, FL, marine moisture challenges often extend beyond simple DIY caulk cleaning. When mold infiltrates enclosed marine heads, galley cabinetry, yacht insulation, or vessel HVAC air distribution networks, specialized intervention is required.
FCS Marine provides professional, mobile on-site service that travels directly to your vessel’s location—whether berthed at local marinas, boat yards, yacht clubs, or private residential docks. Our team delivers comprehensive yacht support, including professional marine mold remediation & yacht sanitization, marine air conditioning repair and optimization, yacht insulation, marine refrigeration service, water purification systems, and equipment rentals.
If you are dealing with persistent moisture issues or want more advanced insights into keeping your facilities spotless, review our pro cleaning techniques for silicone sealant and contact FCS Marine today to schedule professional on-site marine service.