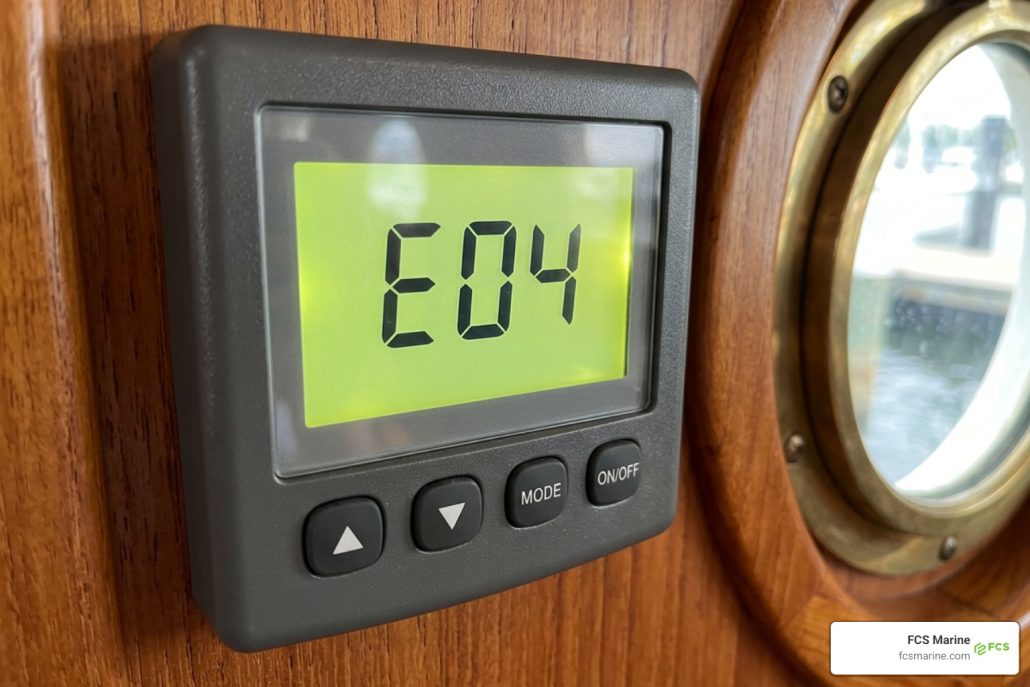
Warning Signs That Demand Immediate Boat A C Repair
To diagnose boat AC issues quickly, follow a systematic five-step inspection: verify electrical power and breaker status, check seawater intake flow and strainers for blockages, inspect air filters and evaporator coils for airflow restrictions, clear condensate drain lines, and evaluate compressor cycling and refrigerant operation. Marine air conditioners operate in harsh environments where high humidity, salt spray, and warm sea temperatures constantly test system integrity. Ignoring early warning signs often leads to severe cabin moisture damage, mold development, or complete compressor failure.
When your boat air conditioning stops cooling, you will typically notice one or more of these common symptoms:
- Warm Airflow from Discharge Grilles: If the blower runs continuously but delivers warm or ambient-temperature air, the system is struggling with heat transfer, low refrigerant, or an inoperative compressor.
- High-Pressure Cutout Faults (HP Errors): Digital marine thermostats frequently display “HP” or “HI PS” error codes when cooling water stops circulating through the heat exchanger, triggering an automatic safety shutdown.
- Water Leaks in the Bilge or Cabin Sole: Standing water under your unit indicates an overflowing condensate pan, a cracked drain fitting, or disconnected drain tubing.
- Musty Odors and High Humidity: A system that runs without removing moisture creates a damp cabin atmosphere, signaling inadequate airflow, dirty coils, or short-cycling.
- Frozen Evaporator Coils: Ice developing on the aluminum fins points to severe airflow restriction, failing blower motors, or low refrigerant charge.
- Unusual Grinding or Rattling Sounds: Rattling or loud humming usually points to worn raw-water pump impellers, failing blower bearings, or severe compressor strain.
5 Steps to Diagnose Your Marine Air Conditioning System
Systematic troubleshooting helps you isolate whether an issue requires a quick filter cleaning, an impeller replacement, or professional intervention.

Before beginning, assemble standard diagnostic tools: a digital multimeter rated for marine electrical work, a clean flashlight, non-contact thermometer, screwdrivers, nut drivers, and a bucket with replacement hose clamps.
Safety Precautions Before Starting Boat A C Repair
Safety is paramount when inspecting marine HVAC systems. Boat systems combine high-voltage alternating current (115V or 230V AC), direct current controls (12V or 24V DC), pressurized refrigerant lines, and raw seawater plumbing within confined spaces. Following safety protocols aligned with the American Boat and Yacht Council prevents electrical and mechanical hazards.
- Disconnect AC power at the main electrical distribution panel or shore power pedestal before removing electrical covers or touching wiring.
- Verify with a digital multimeter that no voltage is present across terminals before proceeding.
- Keep bilge areas ventilated to prevent dangerous gas accumulation.
- Close the dedicated seawater seacock immediately if you must disconnect raw-water hoses to prevent water intrusion.
- Wear protective eyewear and gloves to shield against biological growth, debris, and electrical hazards.
Step 1: Verify Power Supply and Electrical Controls
Start by checking the incoming power and control circuit integrity.
Examine the main breaker panel to verify the dedicated air conditioning breaker has not tripped. If it has tripped, do not continuously reset it; a dead short or seized pump motor may be present.
Inspect the digital display at the helm or stateroom. If the screen is blank, verify the low-voltage control transformer and check for loose terminal connections on the control board. Look closely for burnt wiring, corroded pins, or heat discoloration around relay contacts and start capacitors.
Step 2: Inspect Cooling Water Flow and Seacock Valves
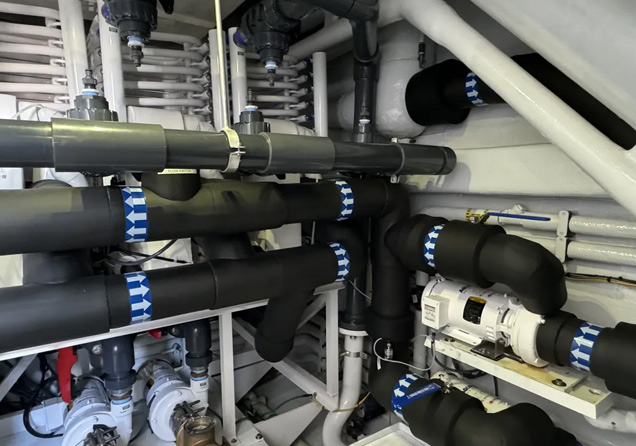
Marine air conditioners rely entirely on raw seawater to remove heat from the condenser coil. If water stops moving, the unit trips on high pressure within seconds.
- Check the Seacock: Confirm the raw-water intake seacock valve is fully open.
- Clean the Strainer Basket: Close the seacock, unscrew the sea strainer lid, and lift out the mesh basket. Remove accumulated sea grass, jellyfish, barnacles, and silt.
- Inspect the Raw-Water Pump: Check if the pump head feels excessively hot or makes a dry buzzing noise. Marine magnetic-drive pumps can become air-locked or suffer melted impellers if run without water.
- Observe Overboard Discharge: Reassemble the strainer, open the seacock, restore power, and inspect the hull side. You should see a steady, vigorous stream of water discharging overboard.
Step 3: Check Airflow, Return Grilles, and Evaporator Coils
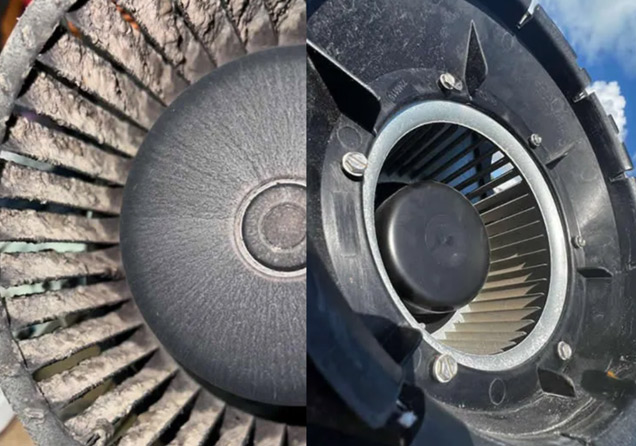
Restricted airflow prevents the refrigerant from absorbing heat from the cabin, lowering system efficiency and causing the evaporator to freeze solid.
Inspect the return air grilles and remove the foam or mesh air filter. Wash away dust accumulation, pet dander, and salt residue with mild water, then let the filter dry completely before reinstalling.
Shine a light into the evaporator coil assembly. If grime, mold, or debris coats the delicate aluminum fins, a thorough service is needed—an indicator that your yacht AC system needs cleaning. Also, verify the centrifugal blower turns freely without binding or rubbing against the housing.
Step 4: Examine the Metering Device and Condensation Drain
The metering device and condensation management system are critical for stable cooling and dry cabin conditions.
Inspect the condensate drain pan beneath the evaporator. High humidity in coastal waters produces gallons of condensation daily. Ensure the drain pan outlet is free of algae, slime, and debris. Clear blockages using a wet/dry vacuum or clean compressed air so water drains freely into the sump box or overboard gravity line.
Examine the thermal expansion valve (TXV) mounted near the evaporator inlet. If the valve sticks closed or its sensing bulb loses contact with the suction line, refrigerant cannot properly expand into the coil. When troubleshooting metering restrictions, addressing or fixing your boat’s AC TXV valve restores proper temperature drops across the coil.
Step 5: Evaluate Compressor Operation and Refrigerant Levels
The compressor is the heart of the refrigeration circuit. Listen closely when the thermostat calls for cooling:
- Normal Start: A steady hum as the compressor engages and begins pumping.
- Hard Starting or Humming: If the compressor hums for several seconds and clicks off on thermal overload, the start capacitor or run capacitor may have failed.
- Continuous Running with No Cooling: If the compressor runs continuously while supply air remains warm, the system likely suffers from a refrigerant leak or damaged internal compressor valves.
Because marine HVAC designs vary—ranging between compact direct-expansion units and centralized systems—understanding whether your vessel utilizes chilled water vs self-contained AC systems helps determine expected operating pressures and loop configurations.
Evaluating Marine AC Diagnostics and Solutions
| Symptom | Probable Cause | Corrective Action |
|---|---|---|
| High Pressure (HP) Fault | Clogged sea strainer, air-locked pump, or closed seacock | Clear strainer basket, prime raw-water pump, clear hull intake scoop |
| Blower Runs, Compressor Off | Tripped thermal overload, failed start capacitor, open thermostat | Test capacitors with multimeter, check wiring, inspect control relay |
| Ice on Evaporator Coils | Dirty air filter, blocked return grille, low refrigerant | Clean filter, verify ductwork clearance, leak-test refrigerant circuit |
| Water in Cabin Sole | Blocked condensate drain, cracked drain pan, faulty sump pump | Clear drain lines, clean drain pan outlet, service shower/condensate sump |
| Low Cooling Performance | Scale buildup in cupronickel condenser, failing TXV | Perform recirculating descaling flush, inspect expansion valve |
Determining When Boat A C Repair Costs Justify Replacement
While minor mechanical faults and clogged plumbing lines are readily repairable, older marine units eventually reach a point of diminishing returns.
Consider replacement over repair when:
- Unit Age Exceeds 10 to 12 Years: Marine units operating in saltwater environments suffer progressive corrosion across copper tubing, aluminum fins, and mounting bases.
- Compressor Burnout on Aged Units: Replacing a seized compressor on an older system often costs a significant portion of a new drop-in unit.
- Extensive Cupronickel Coil Pinhole Leaks: Saltwater erosion inside the coaxial condenser coil allows raw seawater to mix with the refrigerant circuit, destroying the compressor and internal lines.
- Obsolete Refrigerants: Older systems utilizing phased-out refrigerants become increasingly expensive to service compared to modern, energy-efficient units.
Choosing Professional Dockside Service
When internal electrical diagnostics, descaling, or sealed-system repairs exceed routine onboard maintenance, working with an experienced technician is the safest course of action. Mobile marine specialists travel directly to your vessel’s slip, eliminating the hassle and expense of hauling out your boat or navigating to a service yard.
Essential Preventative Maintenance for Marine Air Conditioning
Routine maintenance protects your equipment against aggressive saltwater corrosion and ensures reliable cooling throughout the hottest months.
- Clean Sea Strainers Bi-Weekly: Inspect and empty the raw-water strainer basket every two weeks, or more frequently in waters prone to heavy algae blooms and marine growth.
- Perform Annual Descaling Flushes: Circulate a marine-grade descaling solution through the raw-water side of the condensing coil to dissolve barnacles, calcium, and scale.
- Wash Air Filters Monthly: Clean return air filters regularly to maintain uninhibited airflow across the evaporator.
- Inspect Electrical Terminals: Annually inspect wiring harnesses and capacitor terminals, applying corrosion-inhibiting marine sprays where appropriate.
- Test Sump and Drain Lines: Pour fresh water and mild marine-safe coil cleaner into the condensation pan periodically to verify clear gravity drainage.
Following a comprehensive marine AC maintenance checklist keeps cooling systems dependable and reduces emergency repairs during peak cruising season.
Frequently Asked Questions About Marine AC Diagnostics
Why is water not discharging from my boat AC overboard drain?
The most common cause is an obstructed seawater strainer, an air lock in the pump supply hose, or a closed intake seacock. If the pump runs dry without prime, water will not circulate through the condensing coil to reach the discharge outlet.
How do I know if my marine AC has a refrigerant leak?
Signs of a refrigerant leak include oily residue around copper tubing joints, reduced cooling capacity with normal seawater flow, ice accumulation on the evaporator coil, and extended compressor run times that fail to lower cabin temperature.
Can I run my boat air conditioner while underway?
Yes, provided your vessel is equipped with an onboard generator or high-capacity inverter system and the seawater intake scoop faces forward to maintain positive raw-water flow to the pump while cruising at speed.
Conclusion
A dependable marine air conditioner makes the difference between an enjoyable cruise and a miserable, sweltering cabin. By systematically checking your vessel’s electrical supply, seawater circulation, air filters, and condensate drains, you can quickly identify basic issues before minor disruptions escalate into major repairs.
When complex electrical faults, sealed refrigerant leaks, or compressor failures arise, professional on-site care restores cooling performance quickly and safely. FCS Marine comes to where the vessel is located across Palm Beach County, Broward County, Miami-Dade County, Martin County, and St. Lucie County, providing expert mobile diagnostics directly at your slip or private dock.
To schedule professional diagnostics, system descaling, or repairs, explore our Marine Air Conditioning Services today.